Video Tutorial
For a visual guide on how to install WhatsAuth in Webflow, watch the following video:
This video demonstrates the step-by-step process of integrating WhatsAuth into your Webflow project, helping you visualize the installation procedure.
Introduction
This guide will help you integrate the WhatsAuth Form Validator into your Webflow project to validate phone numbers via WhatsApp. You will learn how to configure the phone number input field and set up custom code to enhance your form’s functionality.
Steps to Integrate WhatsAuth Form Validator in Webflow
1. Prepare Your Webflow Form
Ensure you have a form in Webflow, particularly with a phone number input field where validation will occur.
2. Set an ID for the Phone Number Input Field
- Go to Webflow Designer.
- Select your form block, then click on the phone number input field.
- In the right-hand Element Settings panel, scroll to the ID section.
- Set the ID to
phone_field. - Example:
- ID:
phone_field
- ID:
- This ID is essential for targeting the phone field in your custom JavaScript code.
3. Add Custom Code to the Webflow <head> Section
- Navigate to the Project Settings of your Webflow site.
- Click on the Custom Code tab.
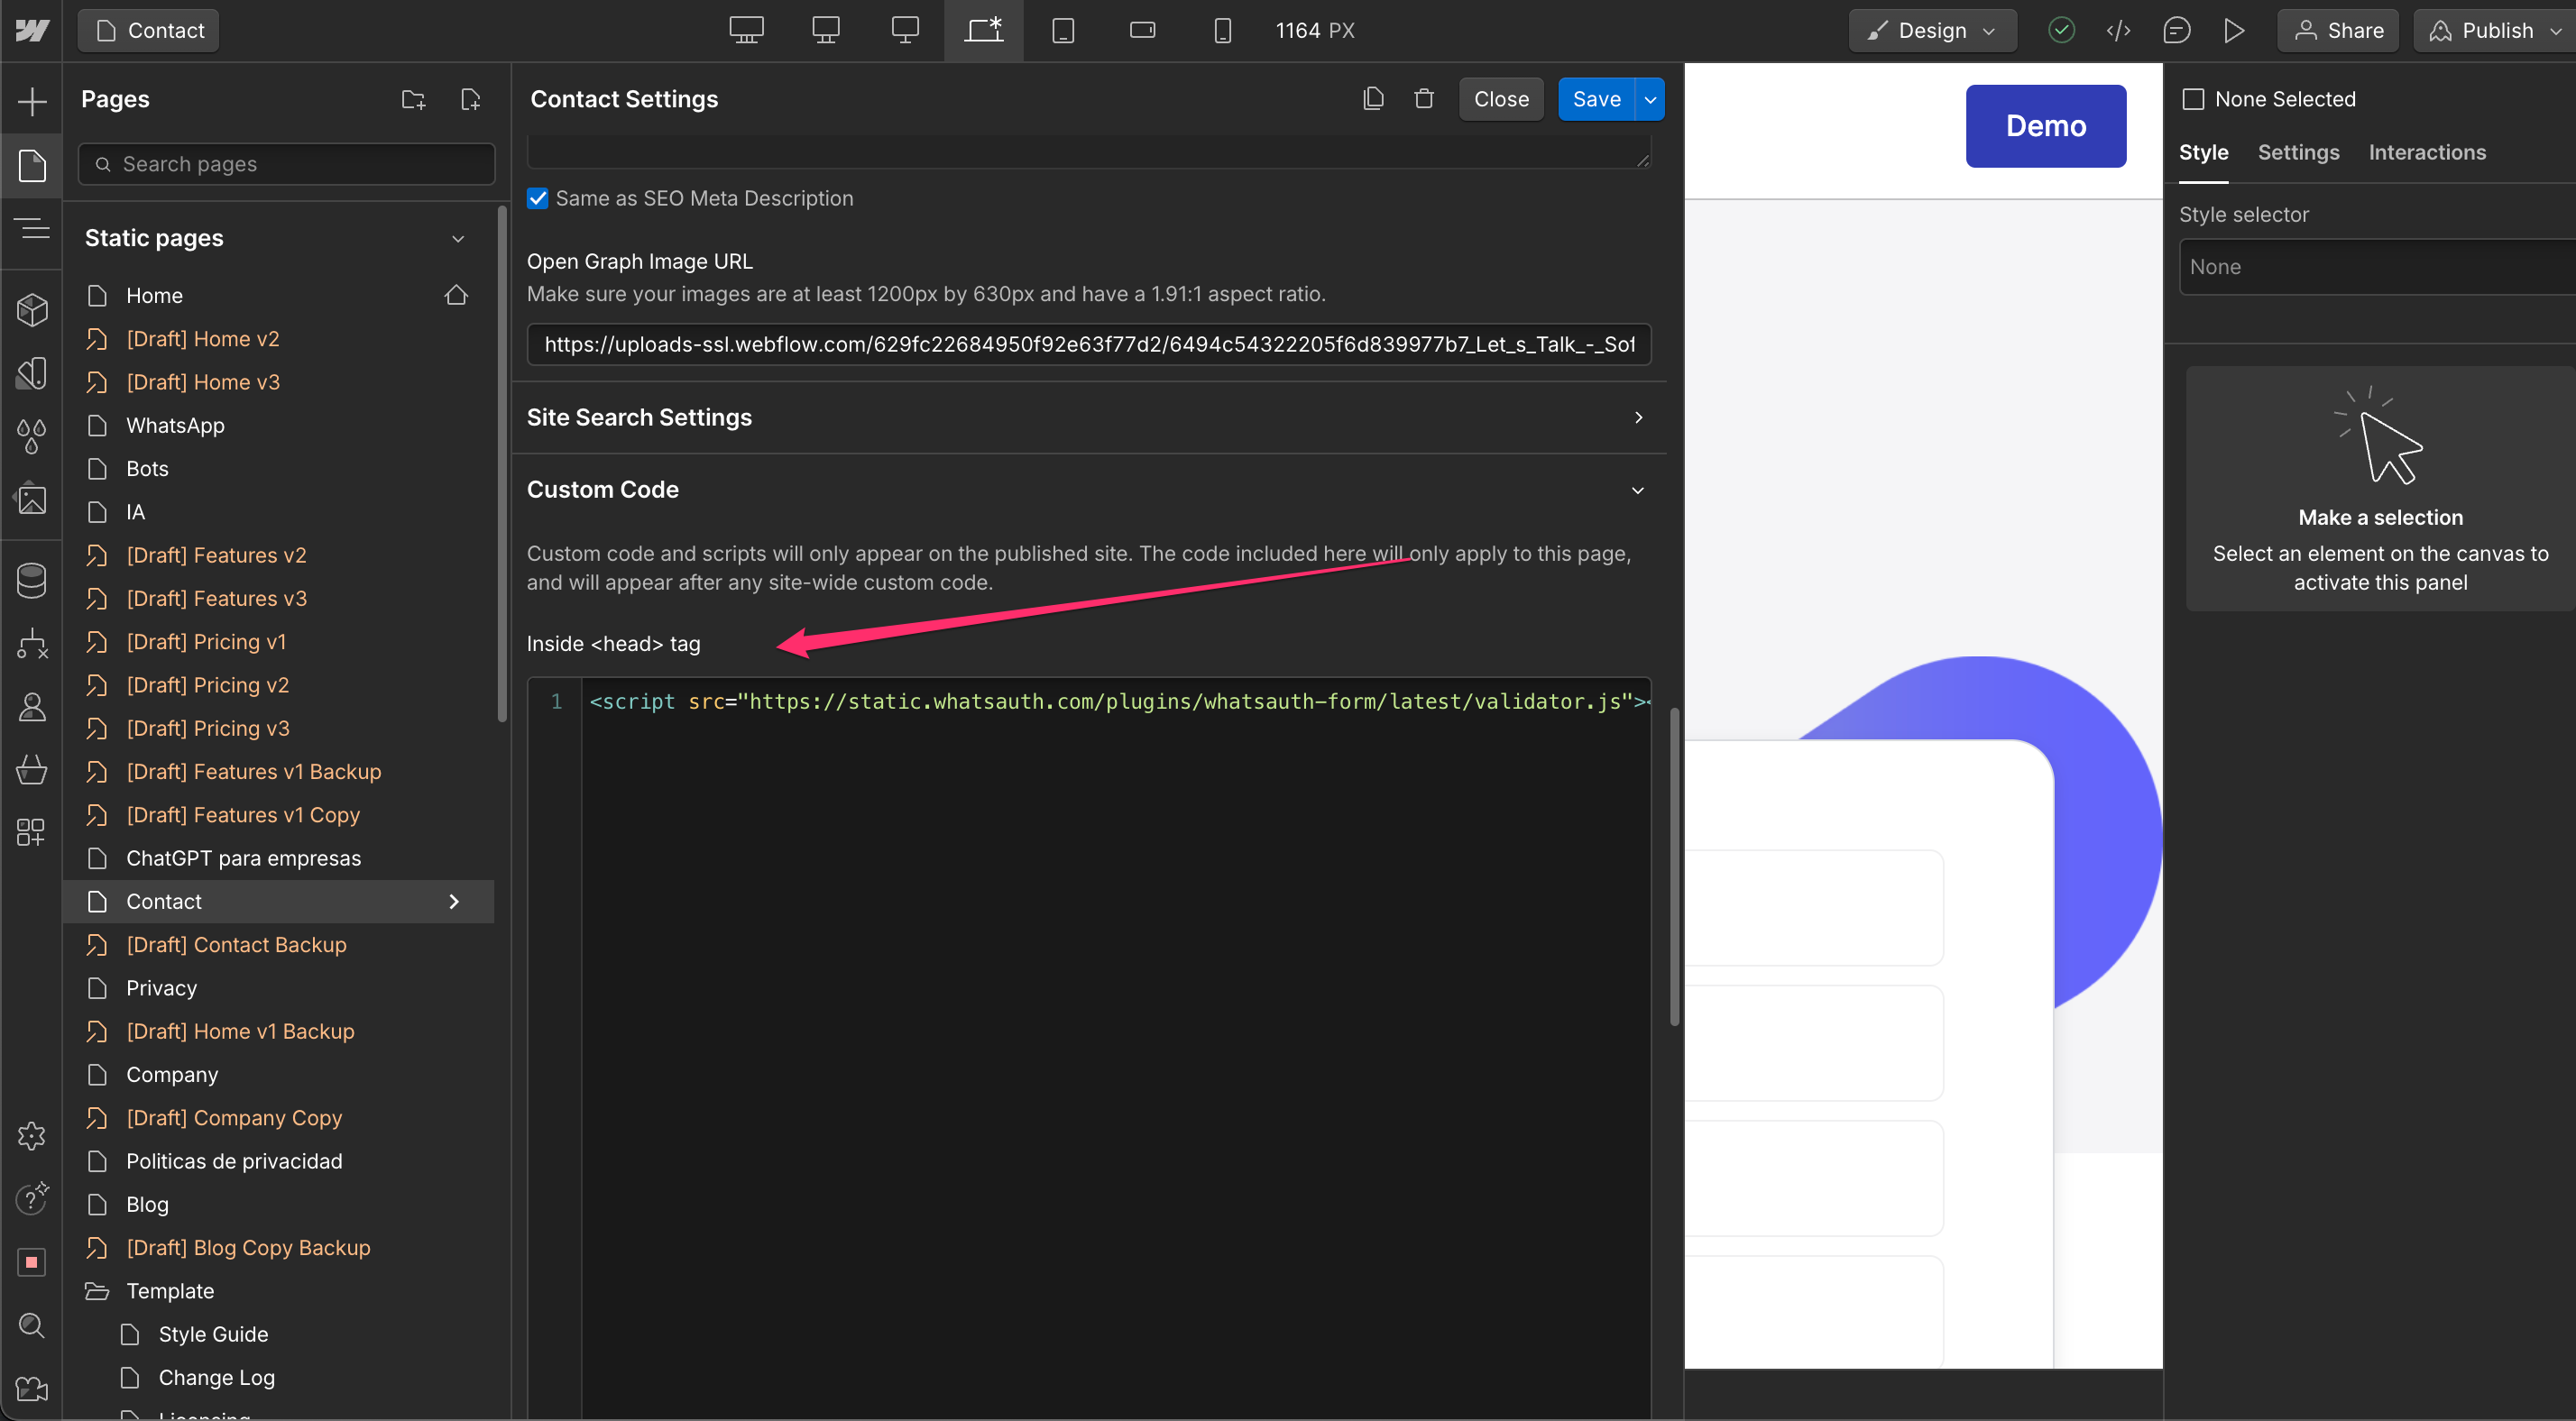
- In the Head Code section, add the following script to load the WhatsAuth library:
<script src="https://static.whatsauth.com/plugins/whatsauth-form/latest/validator.js"></script>
This script ensures that the WhatsAuth Form Validator is loaded on all your pages when published.
4. Add Initialization Script to the <body> Section
- In Project Settings, go to the Before Body Tag section (also in Custom Code).
- Paste the following initialization script:
<script>
  window.$WhatsAuthForm.init({
    inputSelector: "#phone_field",
// The phone input field to validate
apiKey: "YOUR_API_KEY", // Replace with your actual WhatsAuth API key
    description: "Please verify your phone number using WhatsApp.",
    placeholder: "Click to validate your phone number",
    primaryColor: "#2ecc71",
    secondaryColor: "#27ae60",
    btnText: "Verify via WhatsApp"
  });
</script>
- Replace
"YOUR_API_KEY"with your actual WhatsAuth API key. - Ensure that the
inputSelectormatches the ID of your phone number field.
You can also set both scripts at a page level in the Page Settings -> Custom Code for before </head> and before </body> tags.


5. Publish Your Webflow Site
After adding the code to the <head> and <body> sections, publish your Webflow site. Your form’s phone number input will now require WhatsApp-based validation before submission.
Additional Notes
- Customizing Styles: You can use Webflow Designer to style the phone number input field. Custom styling for the WhatsAuth popup and button can be controlled via the configuration options in the initialization script.
- Selector Flexibility: You can target different phone number fields using various selectors (ID, class, etc.), but be sure the selector used in the custom code matches the field ID set in Webflow.
By following these steps, you’ll successfully integrate WhatsAuth Form Validator into your Webflow form, enhancing your site’s security with WhatsApp phone number validation.
References
For more information on adding custom code to your Webflow project, you can refer to the official Webflow documentation:
Webflow University: How to add custom code
This resource provides detailed instructions on how to add custom code to both the <head> and <body> sections of your Webflow site, which is crucial for implementing the WhatsAuth Form Validator.

